
So what else can be done with an image matte besides compositing? Because Pixel Feather's software does a great job obtaining a matte with hair or fur you can now do a great job of editing only that region specified by the obtained matte. Once you have obtained a matte, in the same way it is used to delineate transparency through the alpha channel it can be used as a layer mask to restrict image operations to a region of the image in any photo editors that have a layering ability. This tutorial will explicitly show how to change hair color using the Gimp (Gnu Image Manipulation Program), the same results can be obtained with many other image editors.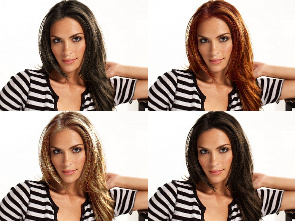
Larger images can be found in our gallery.
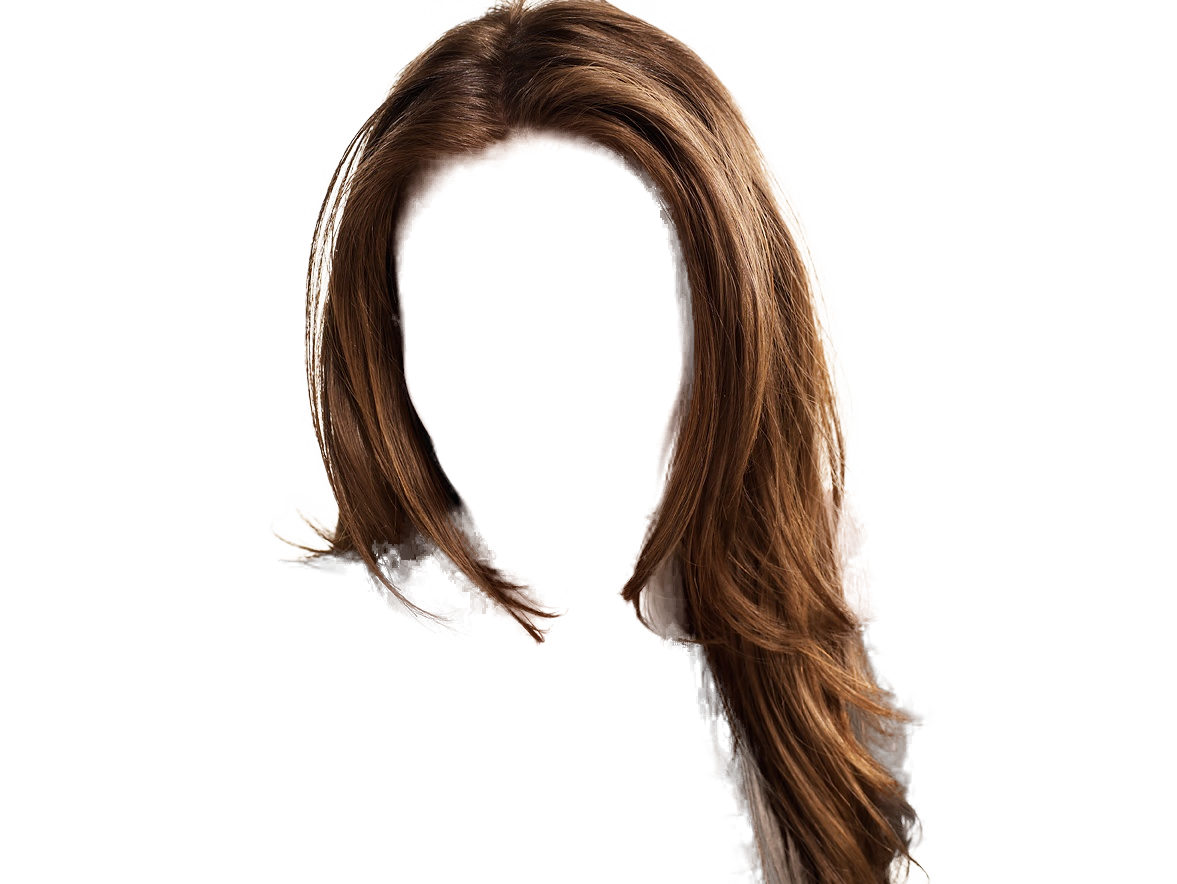
We have used the following image from freestockimages.biz and Pixel Feather's Pullmatte application to obtain the matte (read the quickstart tutorial on how to pull a matte).
O R I G I N A L 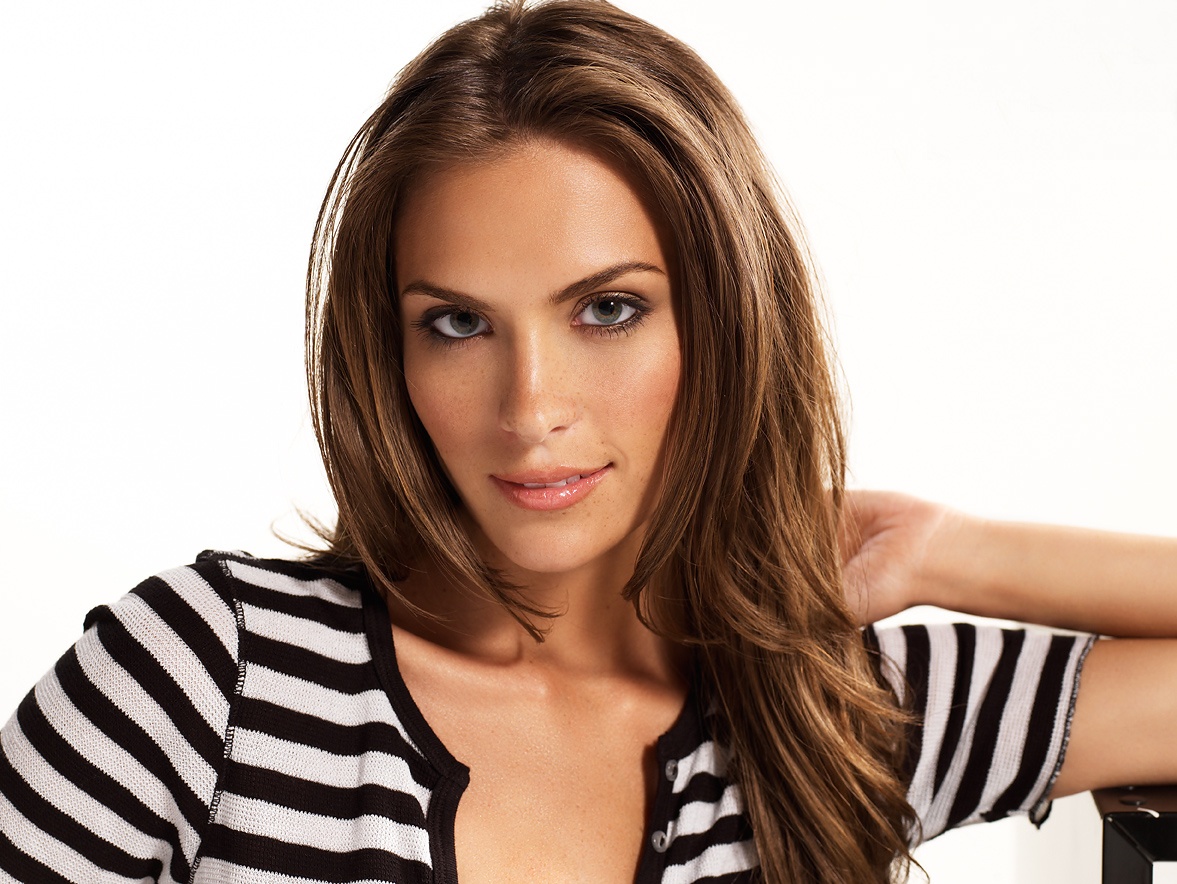 | M A T T E
|
Step 1
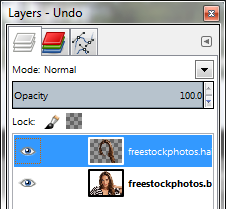
To follow along download the above images by right clicking on the image and choosing "Save link as" (Mozilla) or "Save target as" (IE) noting where you save each file. When you have both files, start Gimp and choose open as layers (CTRL+ALT+O) and select both files by holding the CTRL button while left clicking on each file. Check that the Layers dialogue (CTRL+L) has the matte/hair above the original image. If not left click on the matte and drag it above the original layer.
Select the hair layer so it's highlighted blue.
Step 2
For Red hair:
Choose the colors menu and choose "Hue-Saturation..."
Select the R channel and set its Hue, Lightness and Saturation to -17, 8 and 52 respectively
Then set the Y to 30, -19 and 69.
Step 3
| RED HAIR | BLACK HAIR | SILVER HAIR | |
| R | -17, 8, 52 | 0, -100, -26 | 5, -53, -54 |
| Y | 30, -19, 69 | 0, -90, -56 | 0, -13, -45 |
Finally from the Image menu choose flatten image and save the file in the gimp native format xcf or export it as a jpg or png file from the File menu and choosing export and labeling the file extension png or jpg which ever you prefer (the native format doesn't require the last instruction to flatten the image).
The hair colors shown in the gallery are achieved with the values shown in the following table:
From Brown to Blond
To get to the blond hair colour complete step 1 above. At step 2 change the hair layer's mode from normal to addition by clicking on the drop down arrow in the layers dialoge and select addition.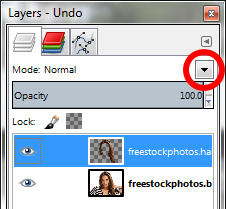
Choose "Color Balance" from the Colors menu. Select Midtones and adjust the color levels to -40, -17 and -2.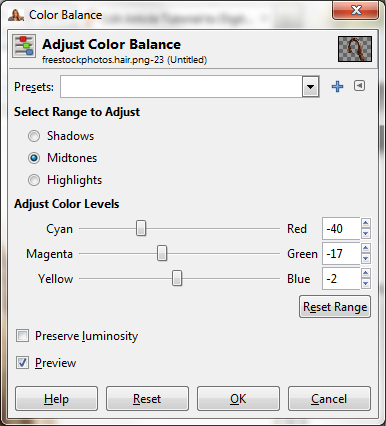
then select Shadows and adjust the Cyan - Red slider to 5 and continue at step 3.